If you are looking to Migrate a classic VM in Azure to ARM , you will need to change your Endpoint port forwards via a Load Balancer
Go to the Azure portal: http://portal.azure.com
Click “NEW” -> write “Load Balancer” in search field -> Click “Load Balancer”

After you have clicked the “Load Balancer”, click the “Create” button.
Then fill out the configuration blade as shown below:
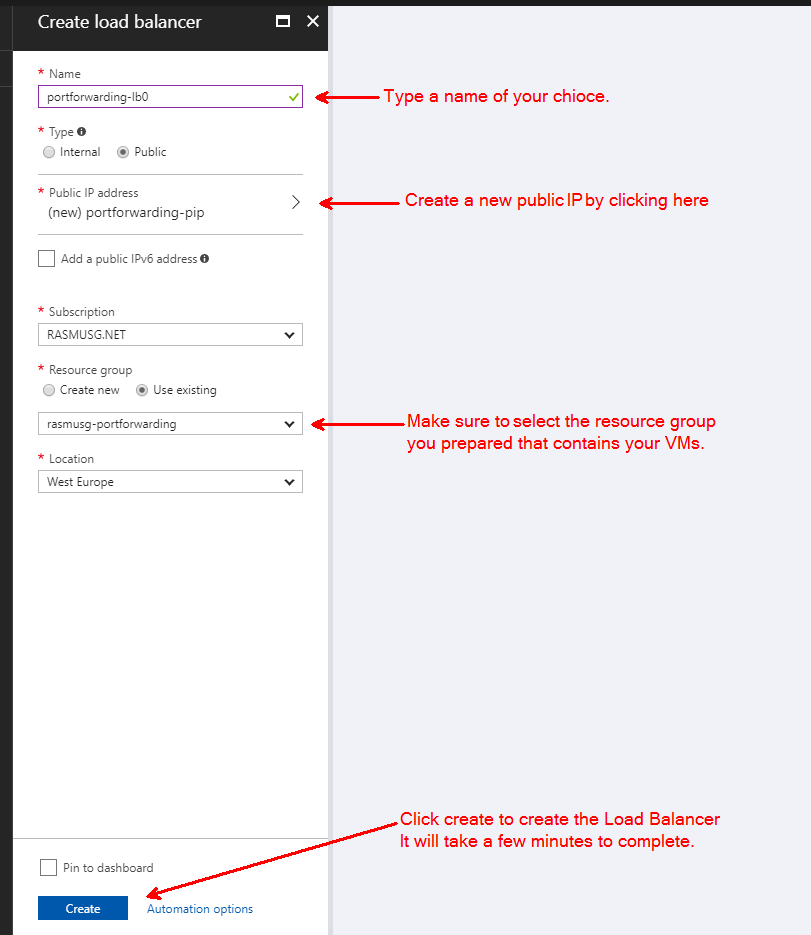
Azure will take a few minutes to create the Load Balancer.
Once created, your resource group will look like this:
Step 2: Configure Load Balancer Backend Pool
In order to connect our newly created load balancer to our virtual machines, we need to create a so-called “Backend Pool”.
To do so click on your load balancer to open its configuration blade.
Click on the item called “Backend Pool” in the menu to the left:
Then click the “Add” button: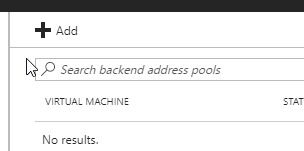
Fill out the “Add backend pool” configuration blade as shown below:
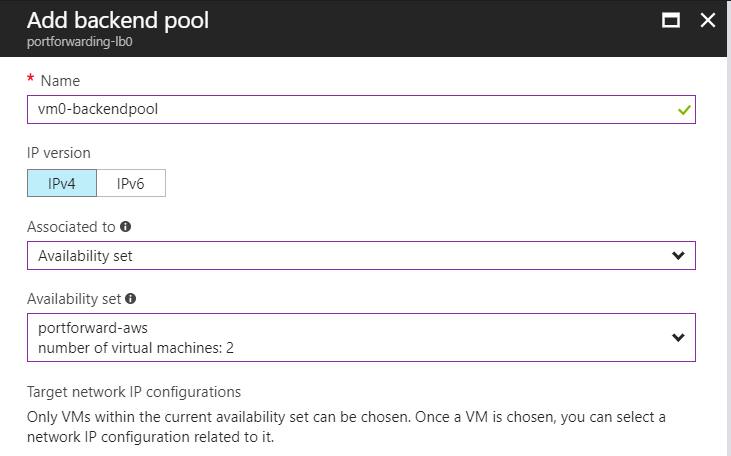
Now click on “+ Add a target network IP configuration”:
…and select the IP configuration for your virtual machine: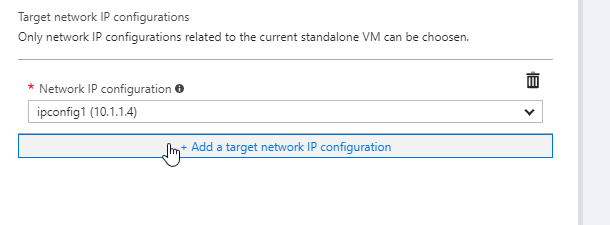
Finally, click the “OK” button to save the Backend Pool.
Now repeat this step; but this time choose VM1 instead of VM0.
All in all, this will give us two backend pools pointing to VM0 and VM1 respectively:
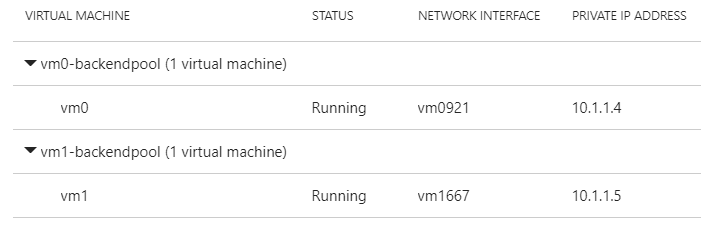
It will take Azure 1-2 minutes to create the Backend Pools
Step 3: Configure NAT rules
Now our load balancer is connected to our virtual machine and we now need to configure rules for redirecting network traffic.
Start by clicking “Inbound NAT Rules” in the menu to the left: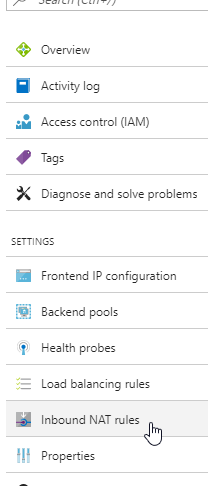
Then click the “Add” button: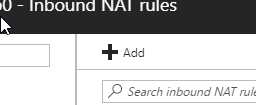
Fill out the “Add inbound NAT rule” configuration blade as shown below: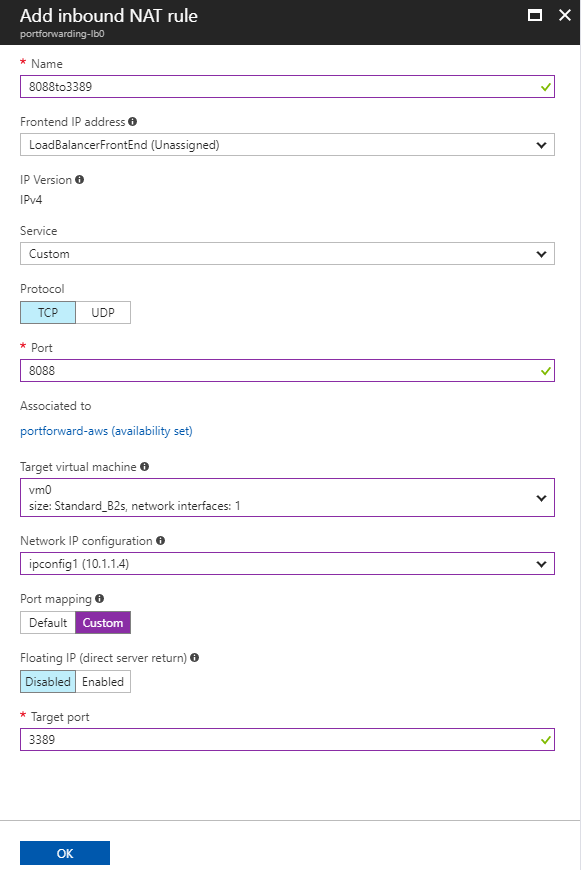
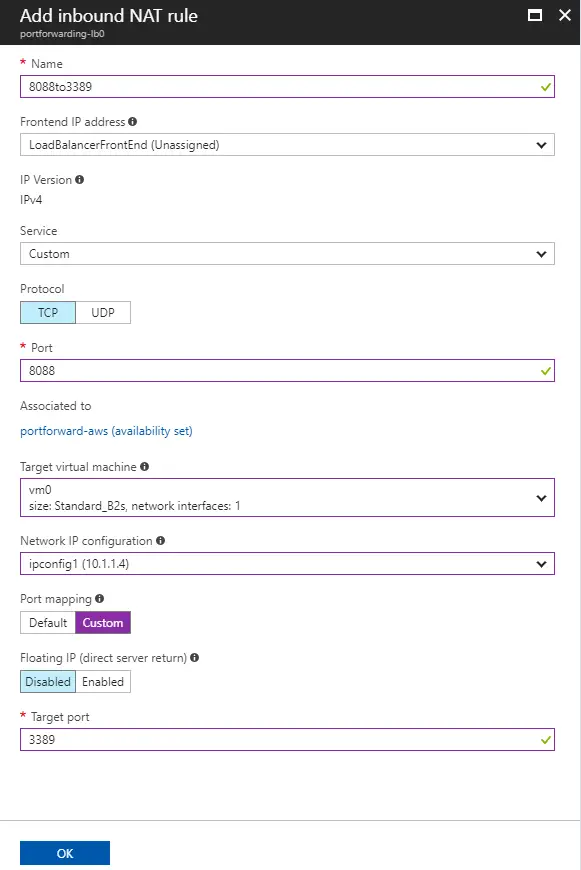
Now repeat this step, but this time choose VM1 instead of VM0 .
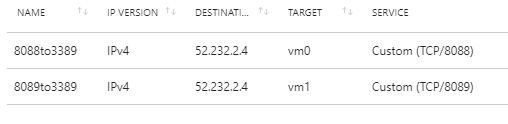
We will now end up with two Inbound NAT Rules: one with port 8088 associated to VM0 and one with port 8089 associates to VM1 :