Azure Cloud PKI is now released; how do we hook Meraki AP to it? – Page 5 – Cisco Community
Step-by-step walkthrough
Part 1 – Microsoft Cloud PKI
Note before starting: There is a tenant limit of 6 CA
If you get it wrong, you do need to contact Microsoft Support to remove them so you can start again who are happy to help.
The setup of the?Microsoft Cloud PKI?is really simple. With a few clicks we are ready to go. Within Microsoft Intune navigate to?Tenant administration > Cloud PKI and click on Create:
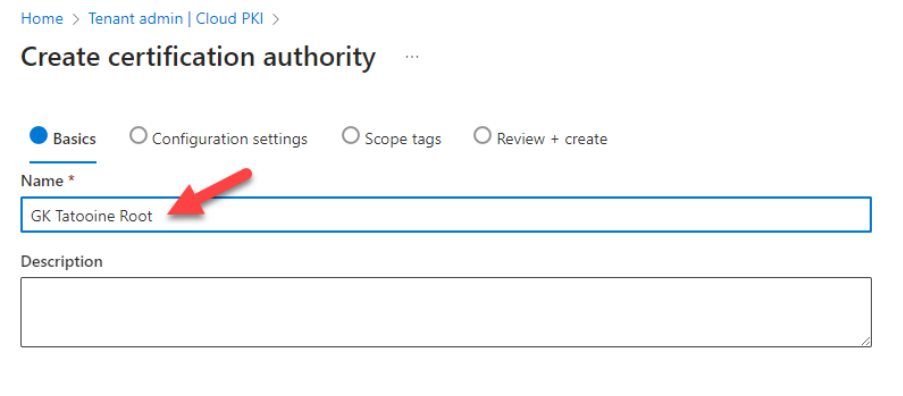
Root CA Creation
On the creation wizard fill in the name of the new Root CA
Select the CA type:?Root CA?with a Validity period:?25 years.
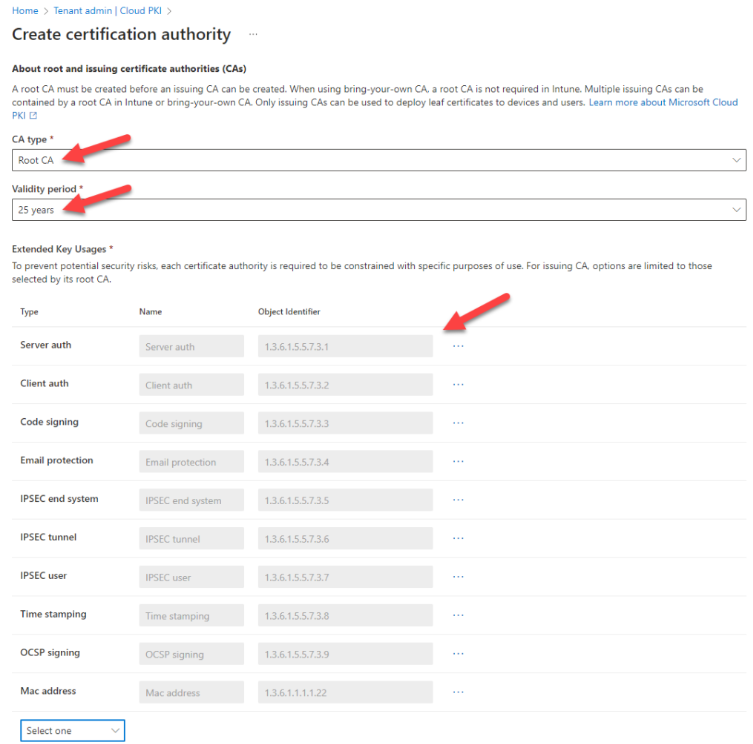
Extended Key Usages: select as minimum Server Auth and Client Auth. But you can add more if you wish.
Fill in all subject attributes for maximum compatibility
O as “your company name”
OU as “IT”
C as “2 digit country code”
ST as “your state”
Locality as “en-us” or “en-gb” or “en-au” or just leave this one blank, no big deal.
For the key size and algorithm, I’ve chosen the strongest one?RSA-4096 and SHA-512
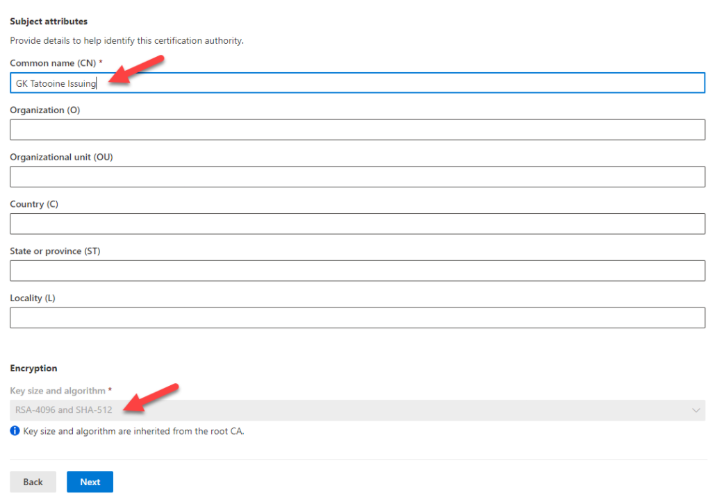
Then click next.
Issuing CA Creation
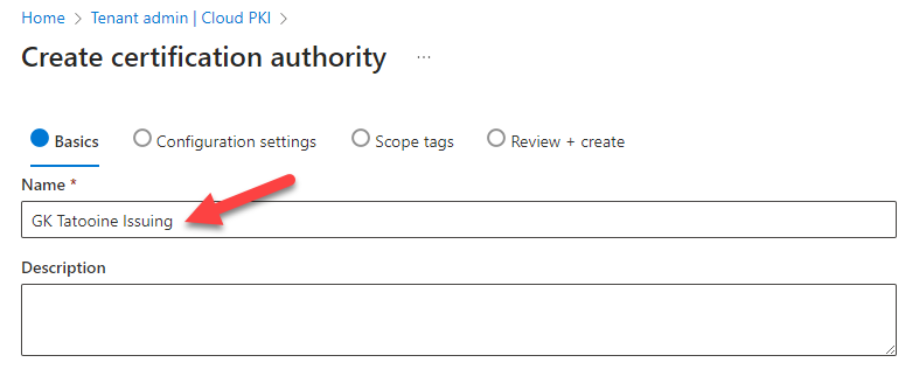
Let’s proceed with the Issuing CA by doing basically the same again and using CA type?Issuing CA. We start with the name of the Issuing CA:
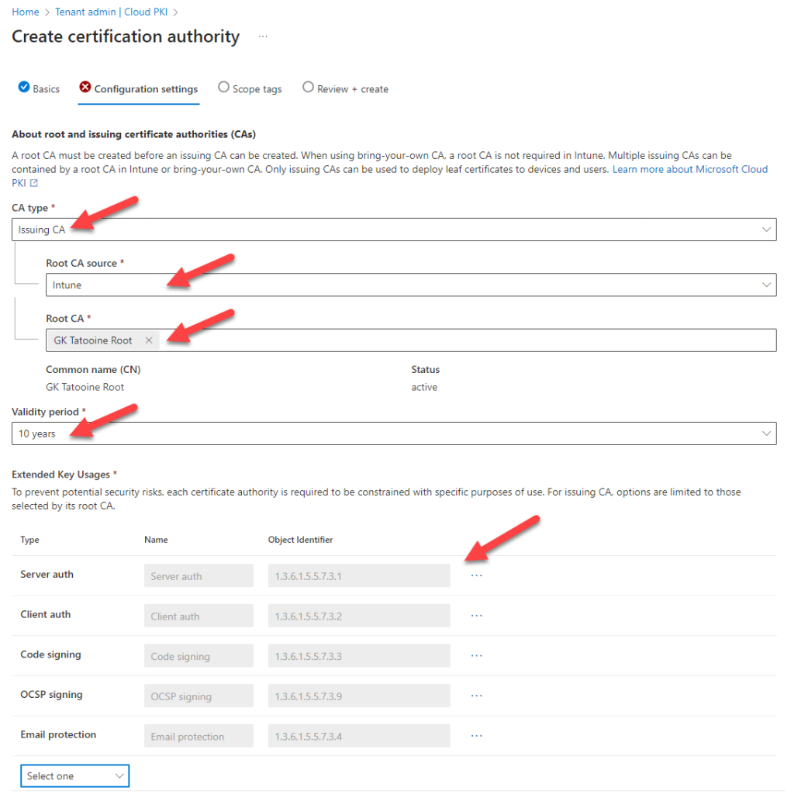
Choose the CA type?Issuing CA?
Select your newly created?Intune?based?Root CA.
Validity period I chose the maximum of?10 years
The Extended Key Usages (EKU) can be chosen based on the ones I’ve added to the Root CA.
Extended Key Usages: select as minimum Server Auth and Client Auth. But you can add more if you wish.
Fill in the Subject attributes and the key size as per Root CA
Finally on the summary page, click on?Create:
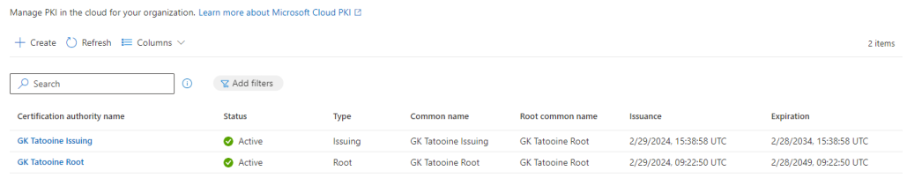
Now we are going to download the Root CA and Issuing CA certificate, as we want to deploy them later to our devices.
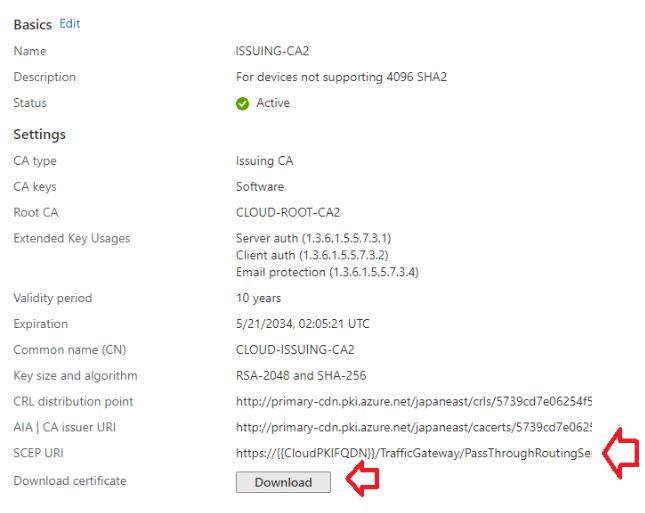
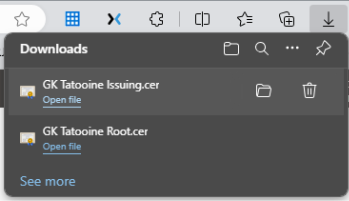
Click on the?Root CA, select properties?and then click on the Button?Download?to download the certificate.
Repeat for the Issuing CA
Also for the Issuing CA, copy/save the SCEP URI, we need this in Part 3
Part 2 – Meraki SSID.
Log in to Meraki and navigate to the Access Control page and select your desired SSID.
Set SSID to Enabled
Under Security, select Enterprise with Local Auth
Certificate authentication Enabled
Password authentication Disabled
Download the IdenTrust Root CA cert and put it with your previously downloaded Root CA and Issuing CA certificates. You will deploy this to your devices later with Intune. Here is a copy of it for convenience.
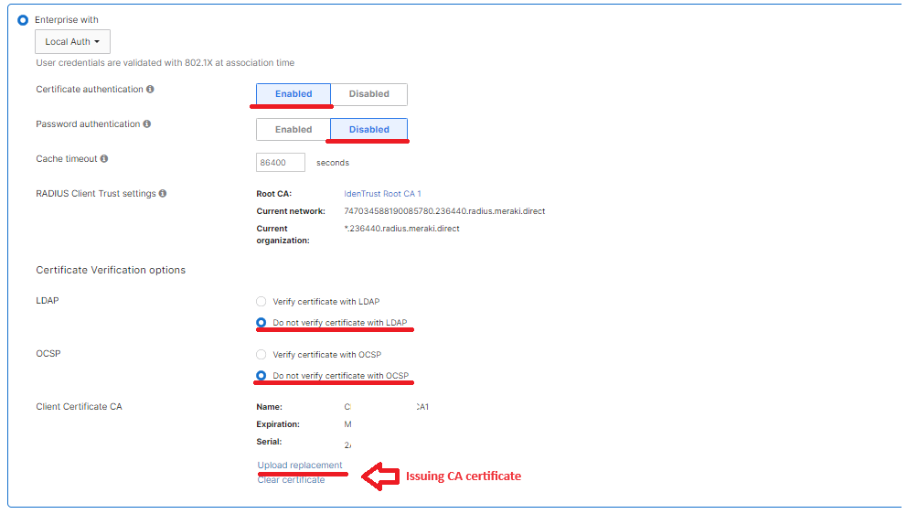
LDAP set to Do not verify with LDAP
OCSP set to Do not verify certificate with OCSP (at least until intune cloud PKI decides to support this function.)
Upload the certificate of your Issuing CA.
Part 3 – Intune device profiles for windows devices.
(The home stretch) Process is similar for IOS.
We are going to deploy 5 profiles in this order:
- Our Root CA certificate
- Our Issuing CA certificate,
- Meraki IdenTrust Certificate
- SCEP Profile (used in the WiFi Profile).
- WiFi profile
Log in to intune, > Devices > Configuration Profiles:
First we create the Trust Profiles
Select Create then New Policy
Platform Windows 8.1 and later
Profile Type: Trusted Certificate
Click Next
Name: Enter the name of your Root CA or desired profile name.
Upload the .cer file of the Root CA you downloaded in Part 1.
Set destination store as Computer certificate store – Root.
Finish creating the profile setting the profile assignments to your Devices group.
Repeat these steps for the Issuing CA and Iden Trust CA certificates you downloaded also to the Computer certificate store – Root.
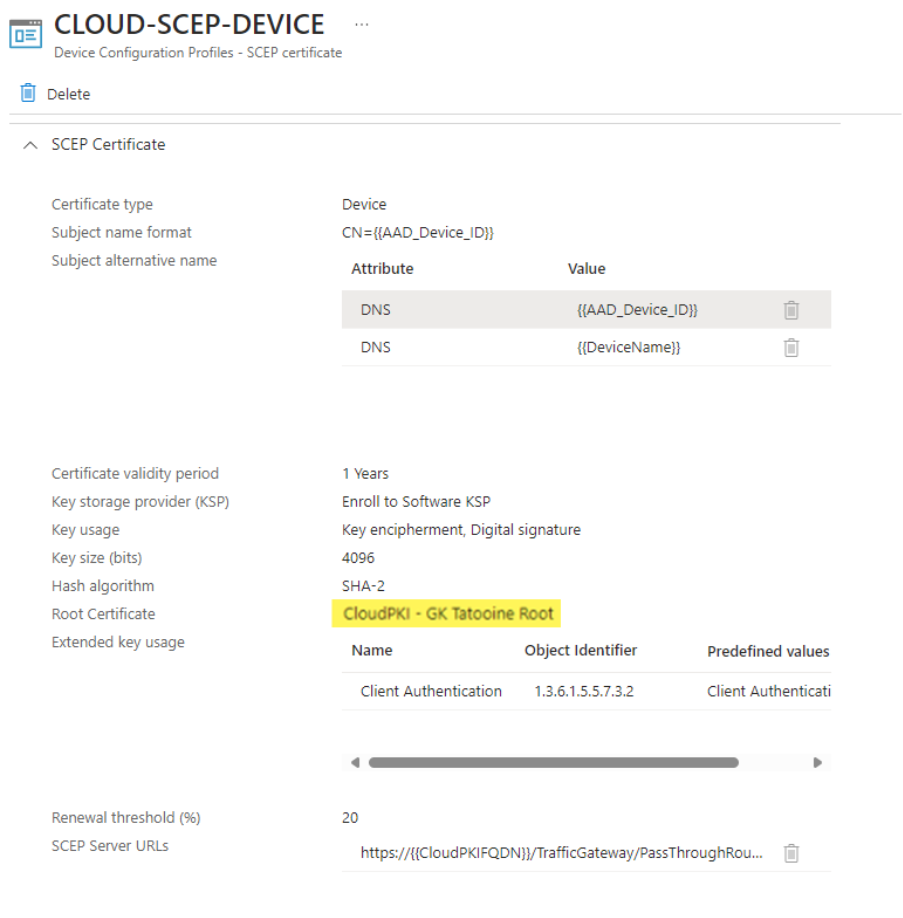
Second we create the SCEP Profile for our devices.
Select Create then New Policy
Platform Windows 8.1 and later
Profile Type: SCEP Certificate
Give it a name and click next.
Certificate type set as Device
Subject Name as CN={{AAD_Device_ID}}
Subject Alternative name as
DNS {{AAD_Device_ID}}
DNS {{DeviceName}}
Validity period as 1 Years
Key storage provider (KSP) set to Enroll to Software KSP.
Note (This is because some TPMs don’t support/like 4096 keys)
Key Usage select both Key encipherment and Digital signature
Key Size 4096
Hash algorithm SHA-2
Root Certificate Select your Root CA.
Extended key usage Client Authentication
Note: Don’t select Any – this wont work with Cloud PKI
SCEP Server URLs: Paste in the SCEP URI we saved in Part 1. If you don’t have it go to your Issuing CA and re-copy.
Save and assign to your Devices group.
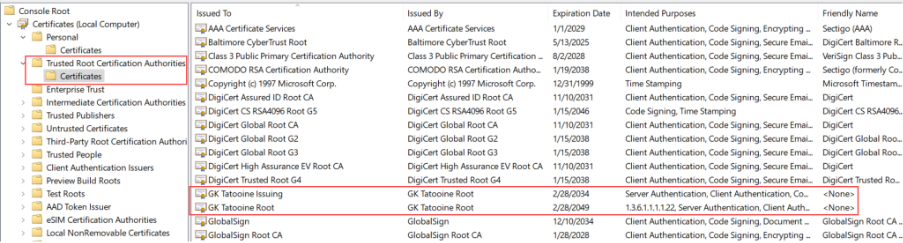
If the assignments are made you should get the Root Certificates on the device(s) and a device certificate.
and also, the device certificate issued by the MS Cloud PKI:

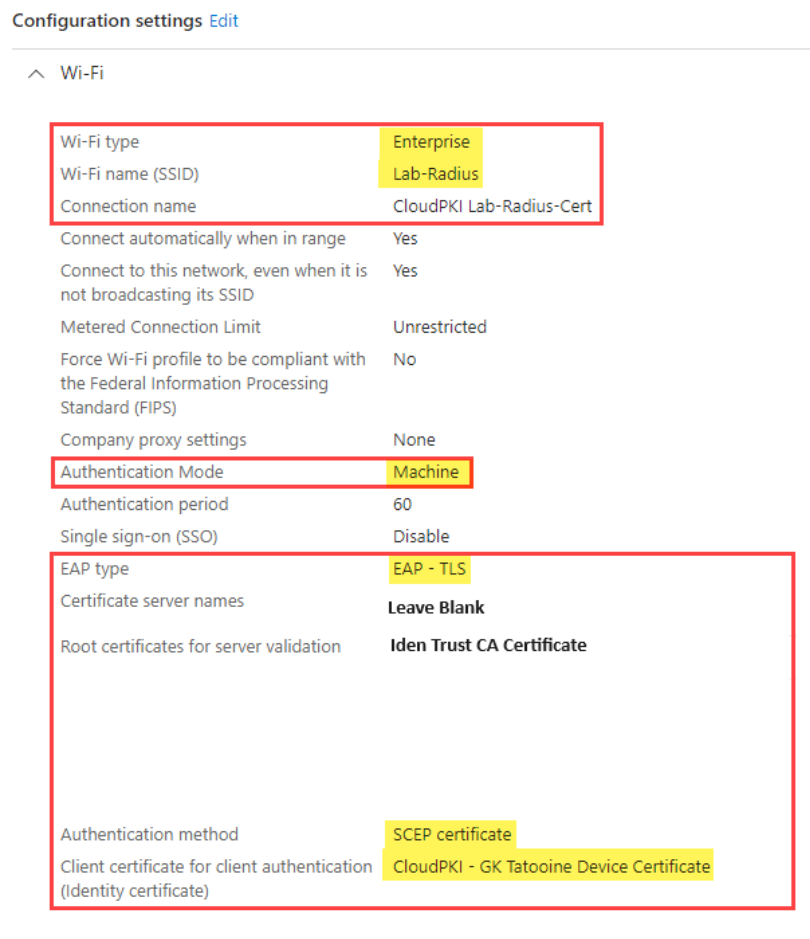
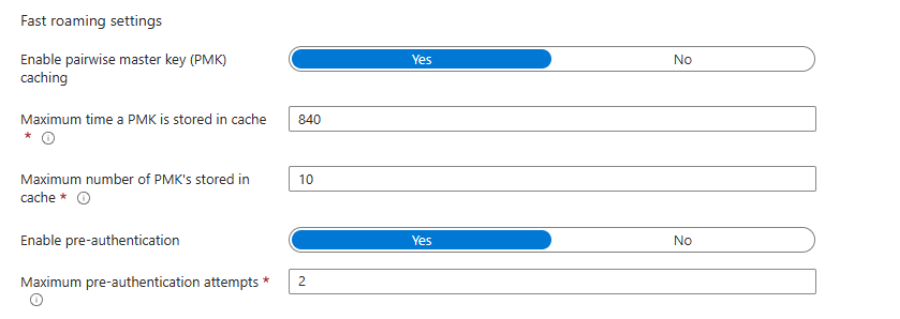
Third and finally we create the WIFI Profile for our devices.
Select Create then New Policy
Platform Windows 10 and later
Profile Type: WiFi
Click Next